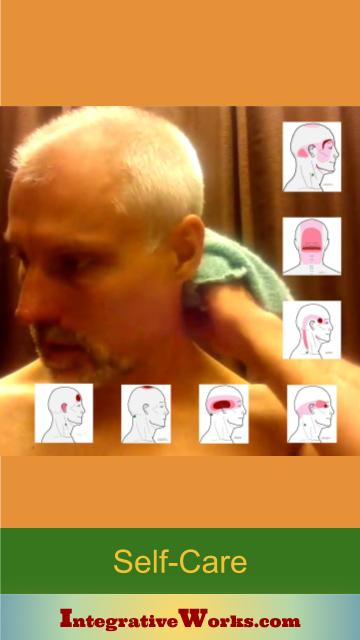
“The Box” is a routine that I’ve given many clients over the years. When used with Ice-and-Stretch, it is quick, easy, and very effective.
It is a well-rounded approach. At the first pass, use it as a complete routine. Some areas will seem tighter and more sensitive to the ice. Revisit that sensitive area after the first round of a complete routine.
Overview
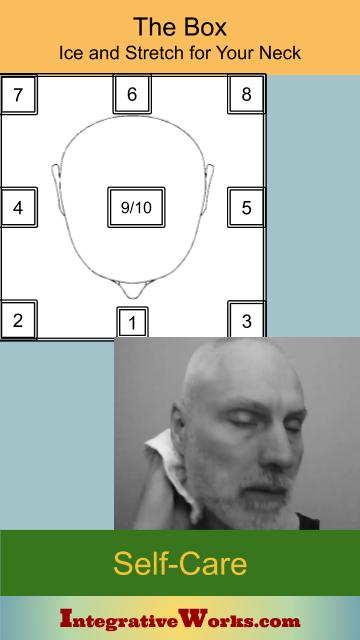
The Box refers to an imaginary box surrounding the head. First, stretch the neck by tilting the head toward each side and each corner of the box. Then, turn your head to the left and right. That’s ten stretches.
In the video below, I stretch the top and bottom of the neck. That’s 20 stretches that take about 6 minutes.
First, stretch the upper neck.
First, use these ten stretches at the top of the neck to loosen the upper cervical, which governs the lower cervicals. Watch the first half of the video to see that.
If you’re working with Forward-Head posture, focus on stretches #1, #2, #3, #9, and #10 in the back and sides upper neck.
Then, stretch the lower neck.
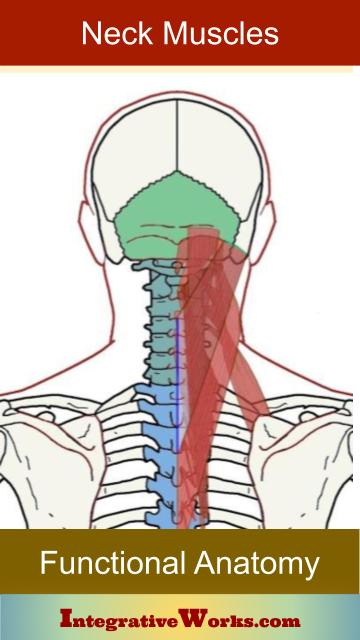
Then, you can use the same ten stretches on the lower neck. Use ice on the middle and lower neck. Tilt the head and neck to stretch the lower and middle muscles of the neck. Watch the second half of the video. The base of the neck in the back is often tense and is usually already overstretched. Focus on stretching the base of the neck at the front. Stretch the SCMs (sternocleidomastoids) to get longer-lasting relief in the back.
If you’re working with Forward-Head posture, focus on stretches #6, #7, #8, #9, and #10 in the lower neck.
A Few Tips Before We Start
Hold your head high. This stretching is more effective when you lift your head away from your body as you stretch. This motion relaxes the muscles that compress the neck and supports the structures to decompress the neck.
A few pops are good for you. The joints in the neck, like your knuckles, may pop as you stretch them. It’s just an air bubble that moves and won’t move (pop) again for about 20 minutes. There are lots of joints in the neck, and there can be several pops that occur. Muscles tense around binding joints, and the click usually offers relief in that area.
Note: If you can get the same pop over and over, every time you repeat the movement, that’s usually a ligament that’s flipping over the edge of a bone. It can aggravate the ligament to pop it repeatedly. Don’t do that.

You can do these anywhere,
with or without ice
but these tips help you
get better results :
- Use a chair with legs or a seat that you can use to stabilize your arms.
- Use a mirror to get the stretches right.
- Sit up straight, off the back of the chair
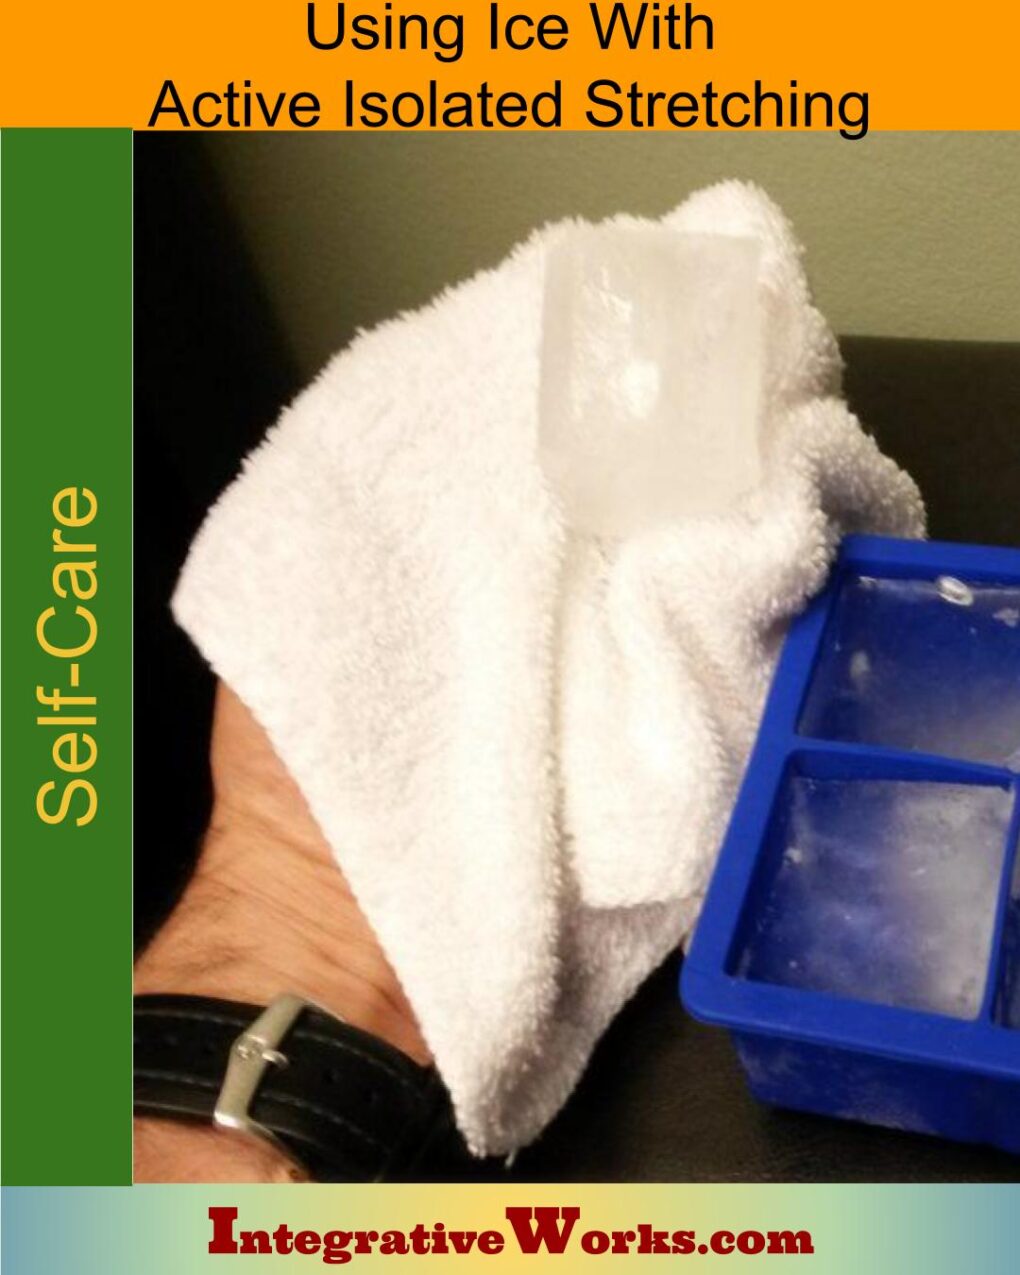
- Have a place nearby to set your big, square, melting ice cube in a washcloth.
Better with Ice and Active Stretching
This stretch protocol works even better when you use AIS guidelines in combination with icing. This is not the traditional icing that takes 15-20 minutes. Instead, a brief stroke of ice on the surface releases the muscle. After, Active Isolated Stretching uses gentle repetitions to relieve the muscle more quickly. This works with the nervous system to retrain the muscle.
This post shows you how to use ice to stretch with less pain and more effective results in less time.
The Video
Here is a video showing the entire routine, all 20 stretches, in less than 7 minutes. If you are not familiar with the Ice-and-Stretch technique, take a few seconds to review this post.
The Stretches
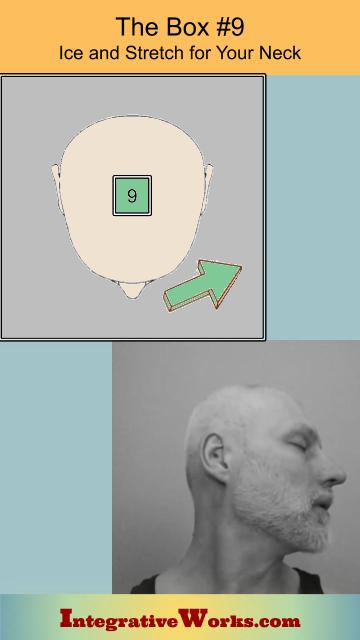
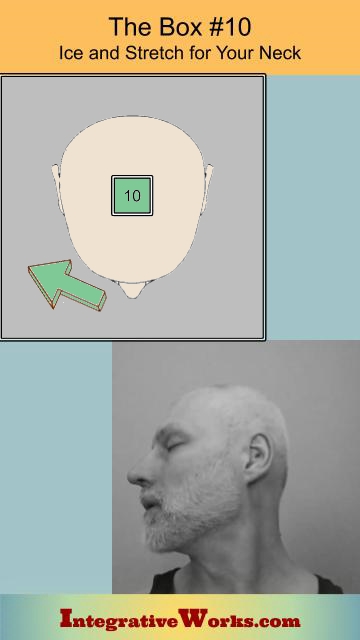
I’ve numbered the stretches based on the direction the head moves during the stretch.
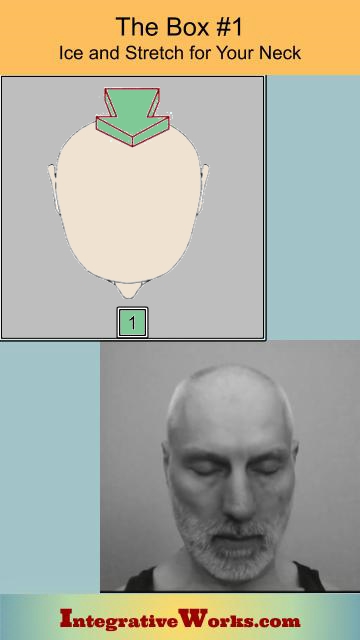
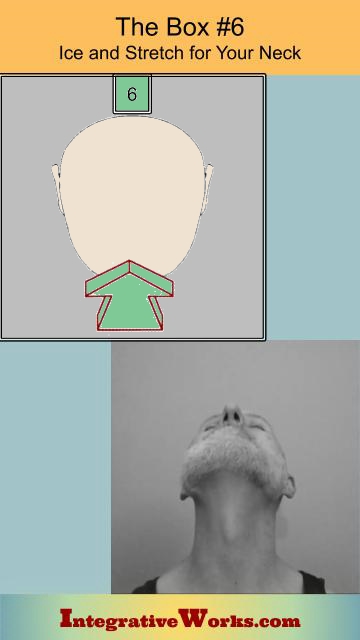
Stretch #1
Ice along the back of the neck in the area under the big arrow.
Tilt the head forward by tucking the chin so that the skin pulls up along the back of the neck and into the upper back.
If you have Forward-Head Posture, stretch a few extra times when you’re working on the top of the neck.
Stretches #2 and #3
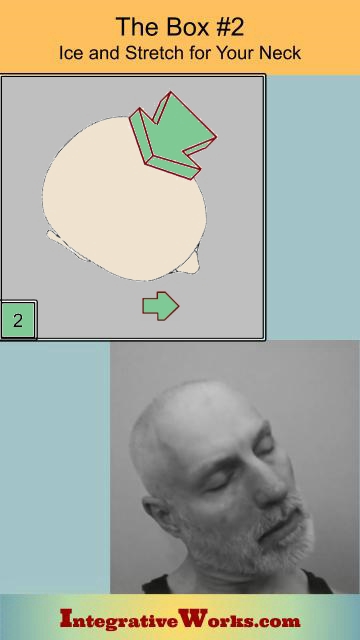
First, ice the back of the neck along the side. Next, turn your nose toward the side that you iced in the back. Then, tilt the top of your head away from the area you iced. Don’t forget to lift.
In general, this area balances tight muscles around the upper cervicals. Give it a few extra reps, especially if you have Forward-Head Posture.
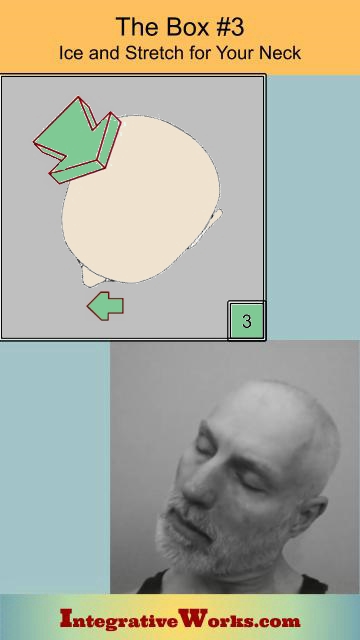
Stretches #4 and #5
First, ice the side of the neck under your ear. Then, tilt the top of your head away from the side that you just iced. Watch yourself in the mirror to make sure that you can still see both ears. and your head is straight.
When you do this correctly, and your arms are secured on the chair, you can feel this pull all the way through the shoulder. You’ll feel it, even when you are stretching the top of the neck.
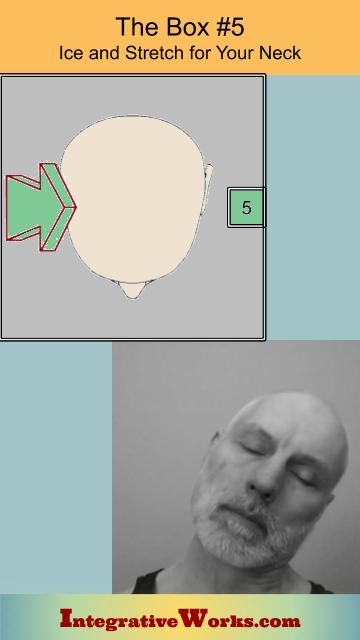
Stretch #6
First, ice along the front of your throat. Next, lift your chin and head away from your chest. Then, jut your jaw forward to create a greater stretch.
Avoid just tilting your head back.
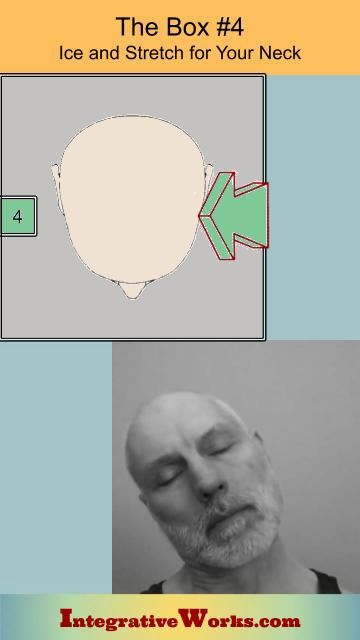
Stretch #7 and #8
First, ice along the side of your neck, in the front. Make sure that you ice the area you didn’t ice in stretches #4, #5, and #6. Next, turn your nose away from the area that you iced. Then, lift the edge of your jaw.
Play with the angle a bit to get a good stretch right where you iced. Focus on lifting and not just leaning back.
This stretch is very effective for Forward-Head Posture and Thoracic Outlet Syndrome.
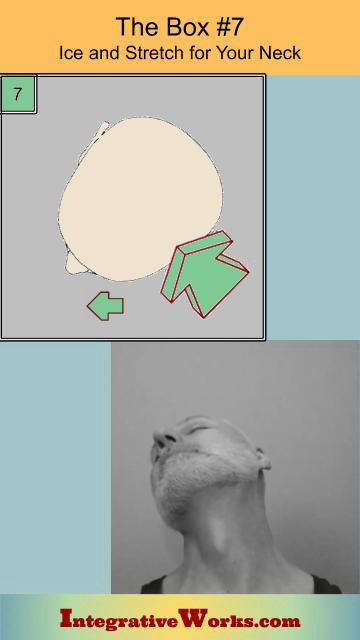
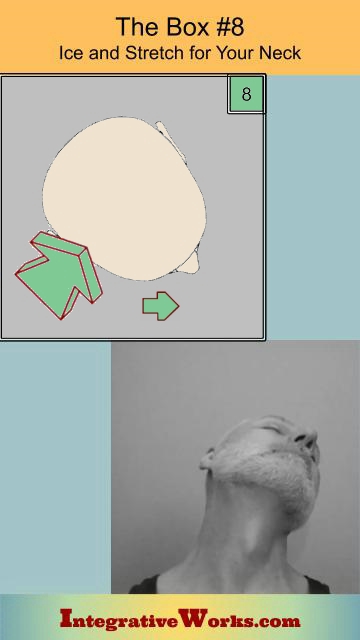
Stretch #9 and#10
First, ice the area on the big muscle that extends from the bump behind your ear to the middle third of your collarbone. Then, turn your nose toward the side that you just iced. To help keep your head level, pick a level along the wall that you trace with your eyes as you turn your head toward the shoulder. Like most of the stretches, this works better if you anchor your arms by grabbing the legs or seat of the chair.
This muscle is very complex, and this stretch can have a dramatic impact on posture and regulation. This muscle pulls the head down and forward as it restricts turning. The vagus nerve runs in a sheath on the deep surface of the muscle. Releasing the muscle consistently leaves the person calm and more evenly regulated.
Support Integrative Works to
stay independent
and produce great content.
You can subscribe to our community on Patreon. You will get links to free content and access to exclusive content not seen on this site. In addition, we will be posting anatomy illustrations, treatment notes, and sections from our manuals not found on this site. Thank you so much for being so supportive.
Tony Preston has a practice in Atlanta, Georgia, where he sees clients. He has written materials and instructed classes since the mid-90s. This includes anatomy, trigger points, cranial, and neuromuscular.
Question? Comment? Typo?
integrativeworks@gmail.com
Interested in a session with Tony?
Call 404-226-1363
Follow us on Instagram
*This site is undergoing significant changes. We are reformatting and expanding the posts to make them easier to read. The result will also be more accessible and include more patterns with better self-care. Meanwhile, there may be formatting, content presentation, and readability inconsistencies. Until we get older posts updated, please excuse our mess.